How to use line-height
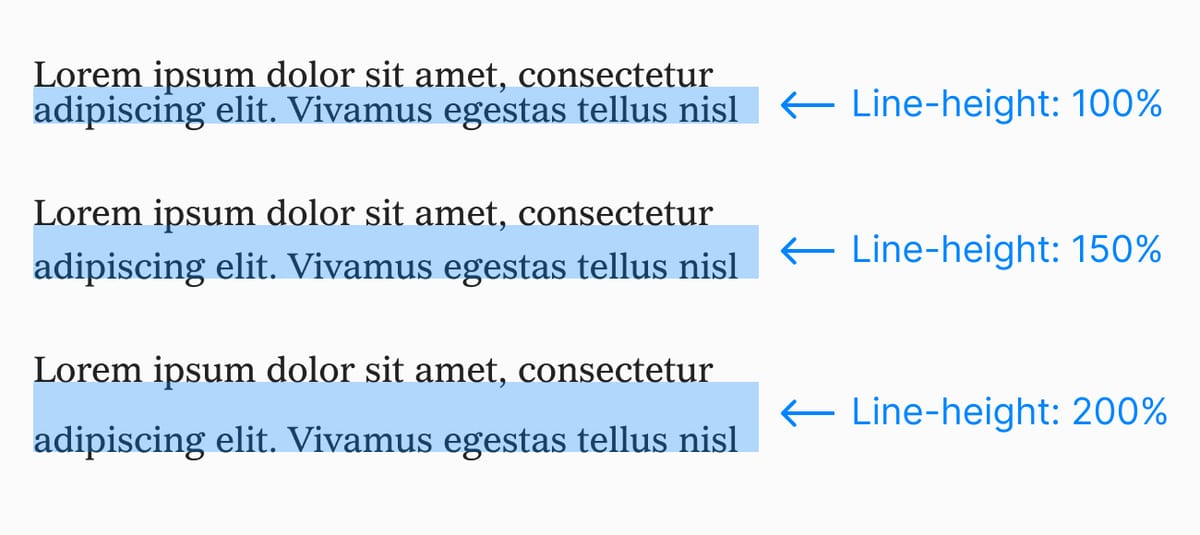
First things first, what is line-height? It’s the vertical distance between each line of type on your screen. As your line-height increases, so does the space between each line like so:
Before computers, typesetters would use a process called “leading” to separate lines of type. They would physically insert pieces of lead in between rows of type.
Luckily we don’t need to expose ourselves to toxic metals to get nice-looking words on our screens.
Why is line-height important?
If the line-height in your copy is too tight or too loose, your site will be difficult to read. What’s the ideal line-height? I’ll give you some numbers in a minute but just remember, the smaller your font size is, the more space it needs between each line.
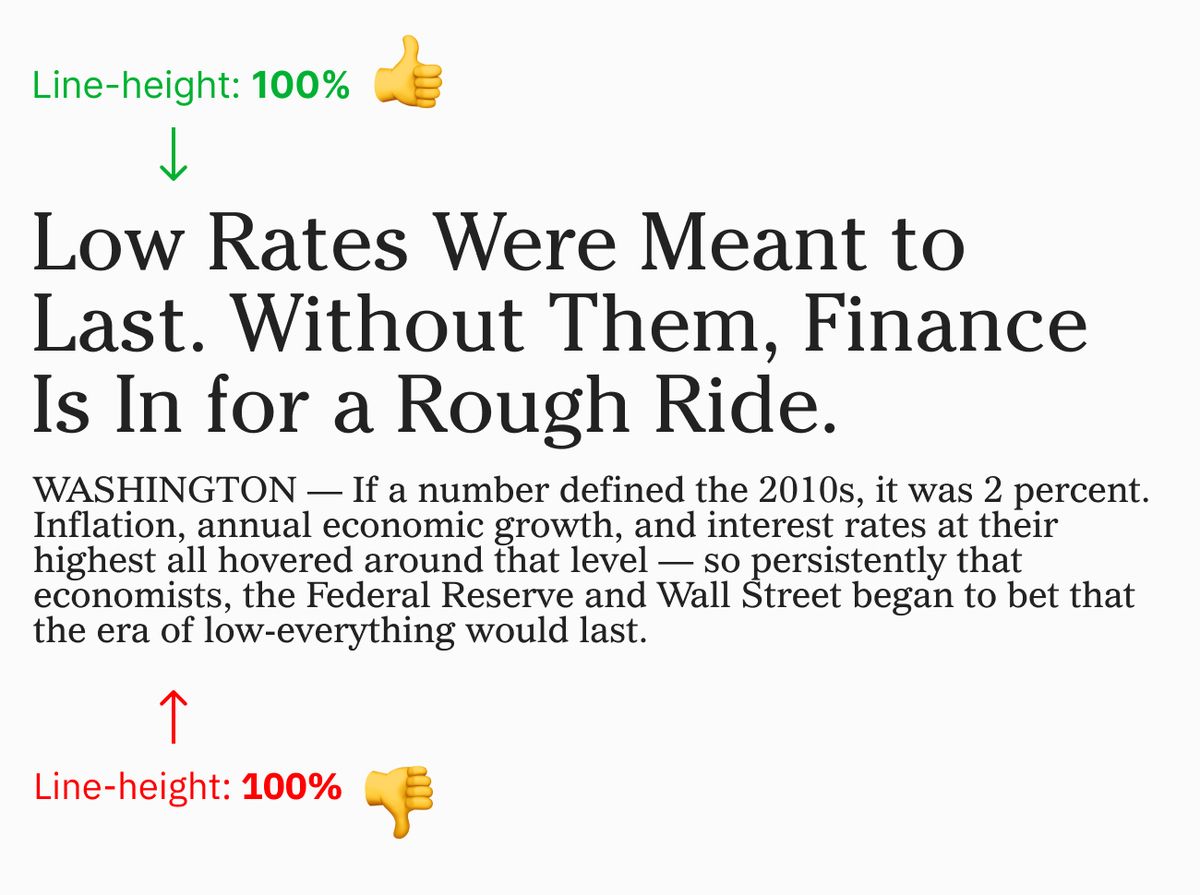
That means a large headline is often fine with a line-height of 100%. But smaller body copy needs more space to be legible. In the example below, our headline has a line-height of 100% and it looks good. But if we use a line-height of 100% for the body copy, it’s almost illegible. The words blend into one another:
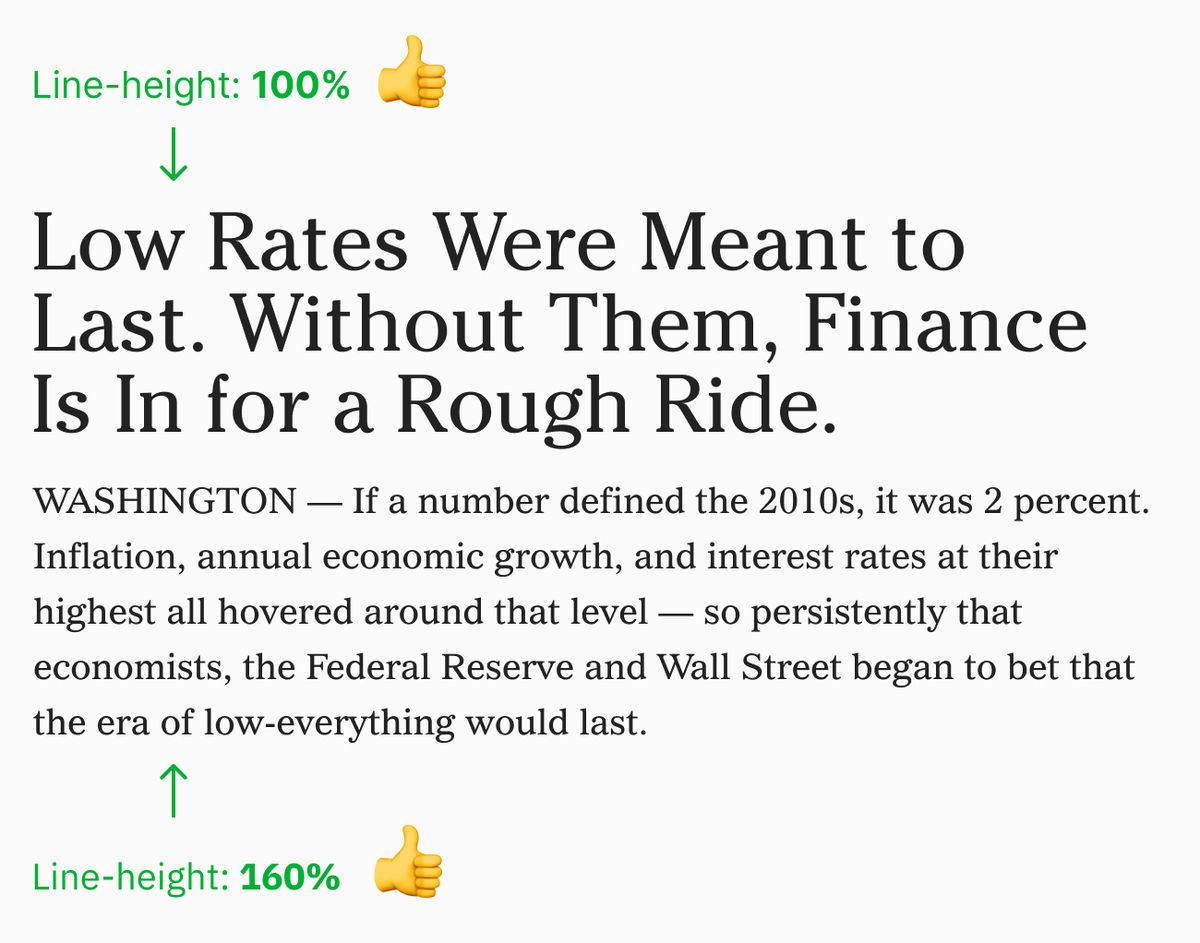
Here’s the body copy with a line-height of 160%. Much better!
Again: Large font; less letter-spacing. Small font; more letter-spacing.
I like to start with a line-height of 100% for my headlines, and 150% for body copy. If you do this and nothing else, you’re 90% of the way there.
If you want the spacing to be perfect, you’ll need to adjust it a bit to match the font you’re using. That’s because some fonts are “taller” (they have a larger X-height) than others and need more space. To get the line-height just right (for body copy), try adding 15% more (165%) letter-spacing and then try it with 15% less letter-spacing (135%). Which version looks better? Keep going back and forth like that in smaller increments until you think it looks good.
Enjoy this? Every Tuesday I send one design tip to help you become a better, smarter designer. Sign up here: